Just bought a used, vintage Cessna? Here are the first four things you should do.
By Scott Sellers
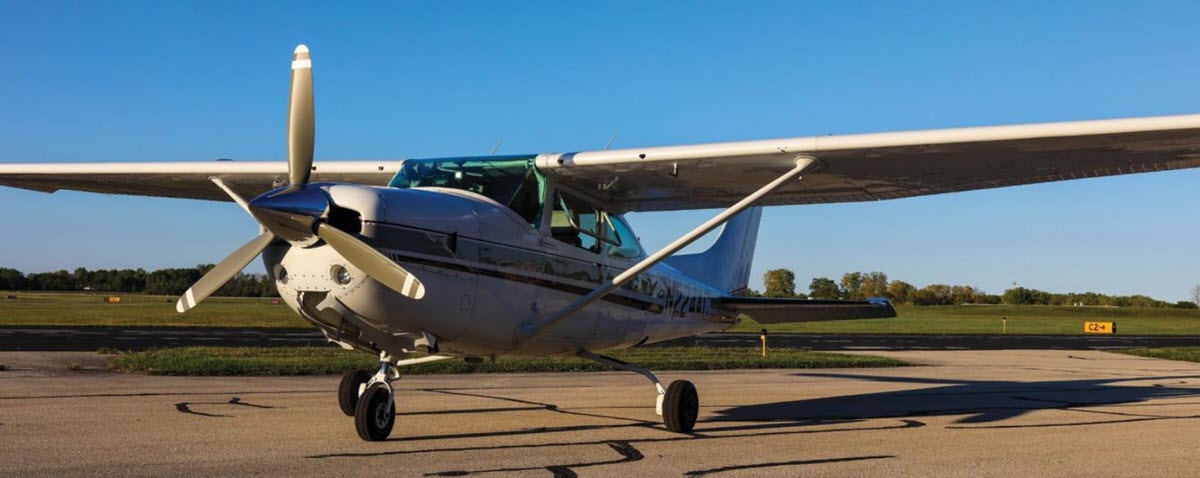
After the recent purchase of a 1978 182RG and delivery trip from Arizona to the Midwest, the reality of figuring out exactly what we acquired began to set in. This is our third single-engine Cessna, and in each case, it took a couple of years of ownership to become completely knowledgeable on the airplane’s condition.
The focus of this article is how to accelerate gaining complete awareness of your new airplane’s condition. A reasonable comparison is home ownership, and this also includes a pre-
purchase inspection, but the reality of learning your home’s condition comes only by living in it. While we’d like to think our new-to-us airplane is in tip-top shape, ready for years of reliable service, our experience indicates otherwise.
Since many of our Cessnas are 40, 50, or more years old, there is much opportunity to defer repairs and maintenance. Commonly, owners lament selling their airplane, so they defer repair items, some of which might not be highlighted in the prebuy report. In each of our three pre-owned Cessnas, we’ve had immediate repair items to address shortly after the purchase that were not anticipated. So the sooner you are totally familiar your airplane’s condition, the more reliable it will be.
Here are the four things you should do first to truly learn about your Cessna.
1. Make a List
Review your new airplane’s engine log and make a list of the number of flight hours and calendar dates of last overhaul for each engine accessory. This gives you remaining service life information about magnetos, starter, alternator and alternator belt, propeller and governor, carburetor or injection system, and muffler, etc., so you can budget and plan overhaul scheduling.
The reliability and safety of your new airplane is completely related to the condition of engine accessories. As a 25-year-plus owner of three Cessna singles, there is a case to be made to simply overhaul all accessories when you take ownership of the airplane, so you know their condition. This is not inexpensive, however.
In our recently acquired 182RG, the magnetos had 65 flight hours and were overhauled just three years prior to our purchase. The first start at home after our nine-hour delivery flight, the left mag failed, so we sent both out for overhaul just to clear the slate and confirm their condition. Looking further into our new RG’s logs showed us the propeller, alternator, and alternator belt had been in service for 17 years and over 1,400 hours — that’s a remarkable run without a failure. Rather than wait for a problem, we overhauled the prop and alternator and replaced the belt.
Proactive maintenance saves money when you consider the cost and inconvenience of breaking down away from home, commonly known as “Aircraft on Ground,” or AOG.
As a final note, many maintenance shops will not sign off an annual inspection if an airplane’s propeller as not been removed for reseal or overhaul in the prior 10 years. If you are flying single engine/single pilot IFR, as we do, a good rule of thumb for alternators is to overhaul at 500 hours of time in service.
2. Get the Published Docs
Gather the list of Service Information documents for your airplane at ww2.txtav.com/TechnicalPublications/SI. You will need to create a login first.
That search generates a list of:
- All mandatory Airworthiness Directives (ADs)
- Recommended Special Airworthiness Information Bulletins — aka Service Bulletins or SAIBs.
- Optional, informational and non-applicable service information documents that apply to your airplane.
When you get to the Service Information dropdown menu, how you fill in the fields is critical to get useful results. Fill in those fields as follows:
- Select Cessna in the Switch To box
- Leave the Search Criteria – Save Searches blank
- Select Turboprop/Piston under Model and leave the drop-down box empty
- Enter your airplane’s serial number in the Serial Number box
- Leave blank the Pub Number, Compliance, Title Description, and Date boxes
- Check all boxes in Publication Type
- Now select the Search button, then make it a PDF on upper right button.
For our 182RG, the search generated a 23-page result with every published document for the model — a great reference archive, for sure.
They may be boring to read, but some are eye-opening and may be worth discussing with your mechanic. Keep in mind Special Airworthiness Information Bulletins are not mandatory, but they are worth knowing about, can add a lot regarding safe operations to your repertoire, and were created to address a problem the FAA found in the field.
For example, our 182RG pre-buy found the Service Bulletin SEB95-20 that calls for visual inspection every 200 hours of the nose-gear-down lock pins was not complied with.
Page 2 of the document states:
“Failure to comply with this service bulletin can potentially result in the nose landing gear to not lock in the down position and possibly collapse.”
Online searching found recent examples of 182RG nose gear collapses while taxiing, so we replaced the down lock pins per the service bulletin during our pre-buy, whereafter visual inspections are no longer needed. We observed the replacement pins to be noticeably more robust than the originals, and they mount with an additional locking pin. Please note this service bulletin applies to all Cessna single-engine retractable aircraft.
While Airworthiness Directives for your Cessna model can be found on the FAA site, the manufacturer (Textron in this case) maintains all other Service Information documents for your airplane. So go ahead and create a login on the Textron site and follow the above steps.
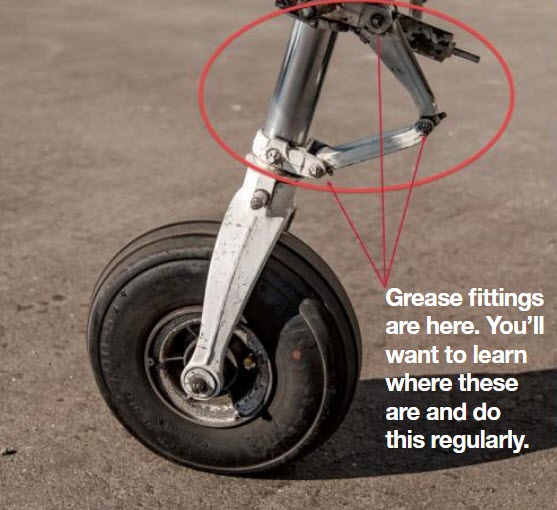

3. Check Nose Gear Torque Link
Check the condition of the nose-gear torque link (often called scissors). This is a simple thing to do, is often overlooked if there’s no nose-wheel shimmy, and it relates to the proper functioning of your nose wheel.
Get down on your hands and knees and grab the torque link/scissors with your hand and try to move it side to side. In most cases you’ll feel some play. A little is OK, but more than that is not. Just because it’s not shimmying does not mean torque link bushings aren’t worn and are not in need of being greased.
Once you’ve greased the torque link, you should feel no side-to-side play in the scissors. If you do, then it’s time to re-bush the assembly and possibly replace or clean (soak in solvent) the grease fittings.
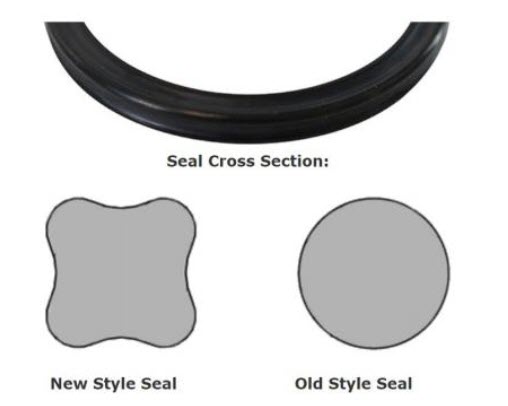
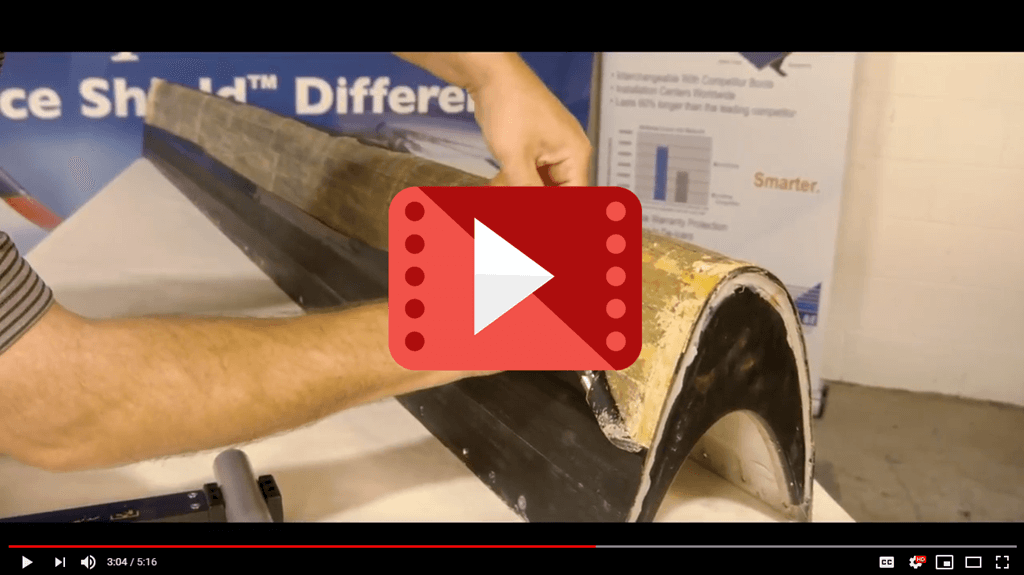
In our 182RG, the nose strut wouldn’t hold nitrogen; it leaked hydraulic fluid due to shot O-rings; the strut pack support ring was pitted and gouged, needing replacement; and the torque link required re-bushing. It did not shimmy but needed a complete rebuild, and we replaced the O-rings with quadrangle seals, which are an upgrade since they offer twice the sealing surface and greater reliability with little difference in cost.
See comparison of seal types below (pictures provided by McFarlane Aviation). The images below can be found at the websites for McFarlane Aviation and Aircraft Spruce and are part of the Cessna nose strut seal kit, part number MCSK172-1F for most models of Cessnas, but you’ll want to check your model numbers, of course.
The new quad seal is an improvement that should leak less and last longer. If you prefer the old style of seal kit, it is part number SK172-1F (again, you can find it on both of those websites but should check your model numbers). We carry a nose strut rebuild kit part as part of our traveling tool kit, and it saved us once when a seal failed. The kits are small, light, and come in a small envelope.
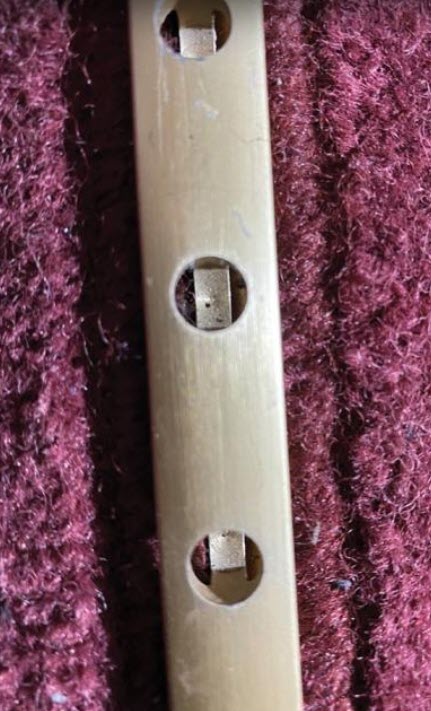
4. Know Your Seat Track & Rollers
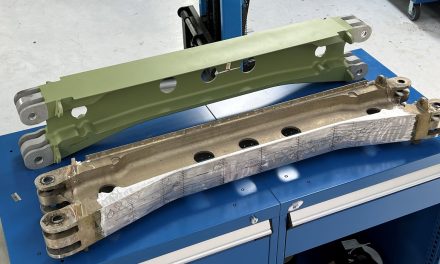
The condition of your seat tracks and seat roller wheels matter, since correct functioning is needed every time you enter/exit your airplane, and for crashworthiness as well. No doubt your pre-buy inspection looked at the seat track holes for compliance with AD 2011-10-09 (SAIB CE-12-14), which states maximum allowable hole diameter on your seat tracks for the seat pins to engage.
However, just because your tracks are legal does not mean they are in good shape. The above images show a worn but compliant track on our 182RG, as well as the one new track that replaced a non-compliant track found at the pre-buy. We will be replacing the other three original worn-but-legal tracks in the coming years.
Regarding seat rollers, we found all eight to be well-worn and substantially out-of-round condition on our 182RG, making movement of seats a difficult exercise. The solution is replacement rollers, which we found from McFarlane (Part No. MCS1704-1, $9 each), so we replaced all eight rollers, and the seats now roll well on their tracks.

Franken RG
After about six months of rehab work, including a more than two-month wait for the prop overhaul, we are getting to know the condition of our 182RG. It is now flying and living up to expectations.
Our mechanic calls it the Franken RG because it sounds like a monster, with a big 300 hp IO 540 Air Plains conversion that seems to be too large up front for a 182RG. Recently, we were departing a 1,600-foot grass strip on a 95-degree day with 2/3 gas and three people, and it broke ground in about 800 feet.
Yeah, this airplane is gonna be a lot of fun.
Second in a Series
Scott Sellers is going to be chronicling his upgrade and restoration of a 182RG. The series started in the September 2021 issue with his story of the prebuy. Future installments will include what to do upon acquiring a new plane, how to evaluate your engine compartment, updating your interior and panel, creating a ramp check booklet, and more.
More Cessna Research
Why you shouldn’t ignore vibration: Propeller balancing advice by DynaVibe.

