By Jim Curns, Organization Member
I bought a new-to-me Cherokee late in 2017 to replace my beloved Cessna 150. As happens with most new plane purchases, the eyes get wide when considering all the goodies that can be added to the new pride and joy.
Among those was a set of shoulder harnesses, a new engine monitor, an autopilot and an IFR GPS. Price and reality got in the way of most of those toys, but the true priority quickly became apparent when several friends were involved in a plane crash.
I don’t use that term often, but there wasn’t much left of the plane, and they all walked away. There was a good lesson in that.
The seat belts were clearly my first choice from that point forward. Having had one engine out myself years ago with no ill effects to reinforced that logical part of the brain that says, well, it’s really rare but it is possible.
I chose to buy a retractable shoulder harness set from Alpha Aviation that included pretty good directions and awesome phone support for when the logic on the paper doesn’t quite match what your eyes are telling you. They were right, and it really did fit like they said it would.
Before
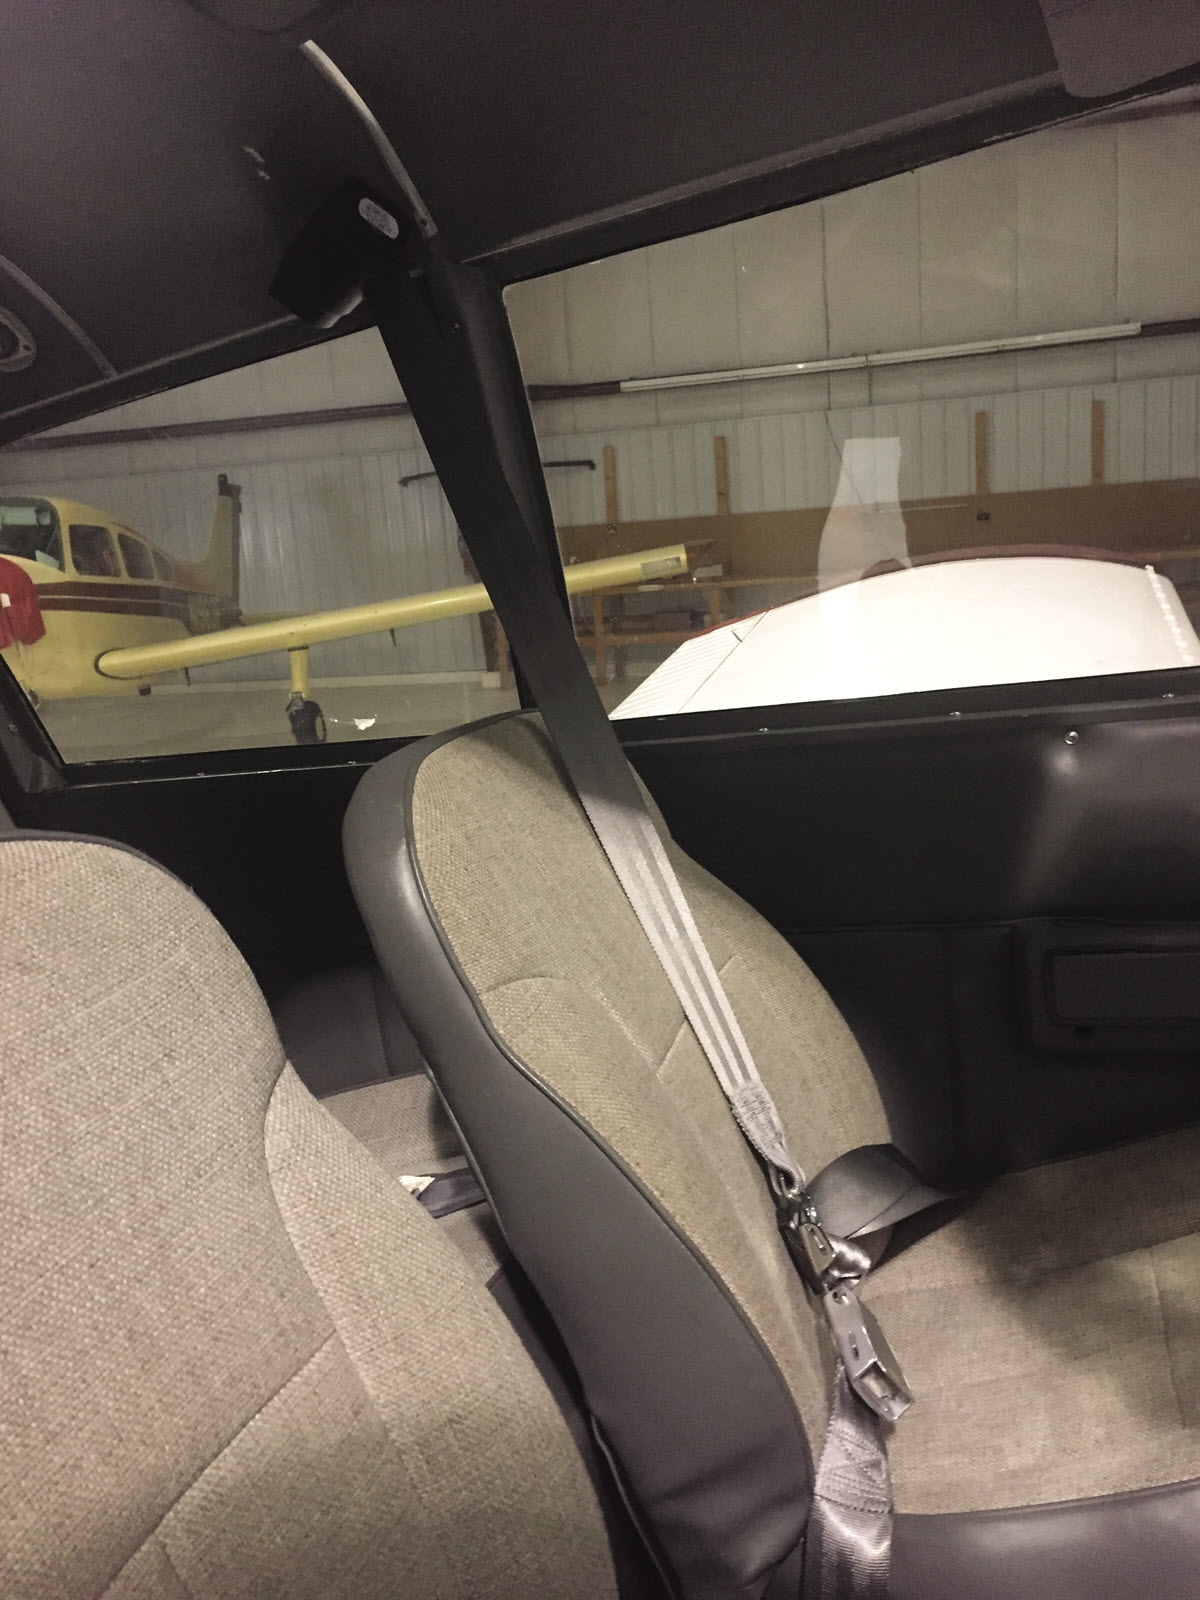
The before picture shows no harness and is why I felt a bit naked when flying after years of having that extra strap cross me. By choosing the retractable system, it still allows the freedom to reach anything I want except the airplane keys that were still in my pocket, just like when in your car.
The front seats come out before beginning the process, and that will make working inside much more pleasant. Then you take a few deep breaths and say to yourself, “Yes, taking apart this perfectly good interior is going to be very much worthwhile.”
Headliner
The headliner needs to be moved well out of the way, which was a bit more work than expected, but I was doing much of this part myself very slowly and carefully under the watchful (and occasionally critical) eyes of a wonderful mechanic and friend. We did one side at a time just in case we learned a lesson that we didn’t want to repeat.
Some Pieces Come Out
With that accomplished the shoulder harness support brackets are fit into place, and at least on a PA-28 you will have a triangular support in the door that needs to be removed. You won’t need it and the door frame will be way stronger than it ever was when you are finished. Your airplane may have different needs here, of course.
Oh the Clecos
The pictures show the bracket with Clecos holding things in place after drilling and deburring. Take your time here to get this just right. We were puzzled at first by having a flat part fit a rounded cabin but after simple directions by phone from Don at Alpha, it did fit just exactly as he said it would.
The riveting was done with a bucking bar and rivet gun so two people are needed to do this portion of the job. It turned out quite well. Yes, bucking rivets was a newer experience for me, but they look very good (and I’m a tough grader). Some finesse is involved and the timing on the gun needs to be right.
Replacing the Headliner
Putting the headliner back was a bit tougher than I expected and I spent a ridiculous amount of time getting it really straight, and occasionally doing part of it over, but it was also a labor of love as I wanted it just right.
One very big helpful tip to consider is when laying all the trim pieces outside the plane, place them in a logical order so you know how they go back. I also took a bunch of pictures with my phone during removal to have for reference when I got stumped putting it all back.
During the process of putting the headliner back, it’s smart to figure out just exactly where the bolt holding the reel is going to go through that fabric while you can still find the hole. We made a very small marking hole first, and widened it to match once things were tight. We then used a soldering iron on the fabric to make a hole that will not run or tear. Remember it IS supposed to be burn-tested material.
The covers on the reels do pop off for installation, although not easily, and that’s a good thing. I chose to trim a bit of plastic from the back side of the covers just to keep it from ever marking the fabric headliner if it were to move. I’m not sure this was necessary, but it made me happy and you can’t see it at all. Besides, they fit like a dream.
Replacing the Lap Belts
The lap belts were then changed … and I got to learn about not dropping the bushings in places that are tough to retrieve them from. A person with skinny fingers (and not my size 10 ring finger) will help with this.
Zinc chromate primer had been applied to the alodine aluminum supports before riveting them in. Those rivets on top of the cabin also needed to be painted. It just so happened I had some touch up paint anyway and used the finest of brushes to paint each rivet head both with primer and color to match the rest of the plane. It looks pretty!
Once all that is done, and you vacuum out the rest of the drill shavings for the third time you are ready to install the seats.
After the paperwork, including the STC and weight and balance update, is to enjoy that feeling of the new shoulder harness. To me it was like a nice friendly hug, and I love those.
