By Scott Sellers
COO Editorial Board
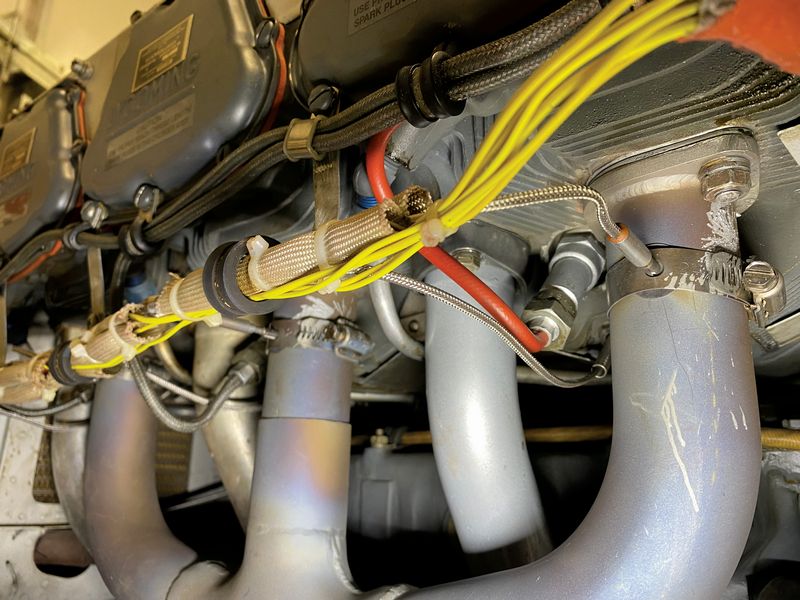
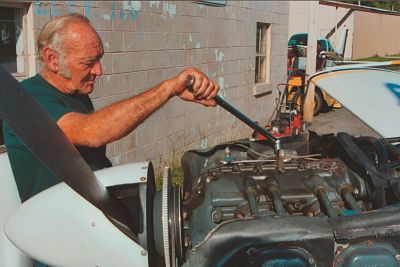
Engine exhaust system condition is not a sexy topic, but it is a critical one for Cessna pilots to be knowledgeable about. Exhaust issues were the first maintenance item I learned as a new airplane owner when an exhaust leak at the cylinder flange caused erosion of the cylinder head.
My original maintenance mentor pointed out how leaking exhaust gases are like a blow torch, and how just a couple of flight hours can do serious damage to cylinders if exhaust leaks occur. He was a crew chief on a B-25 in WWII and was taught the importance of checking exhaust riser-to-cylinder flange connections as a pre- and post-flight checklist item, as well as a preventative maintenance item. We ended up replacing that cylinder due to damage caused by the exhaust leak.
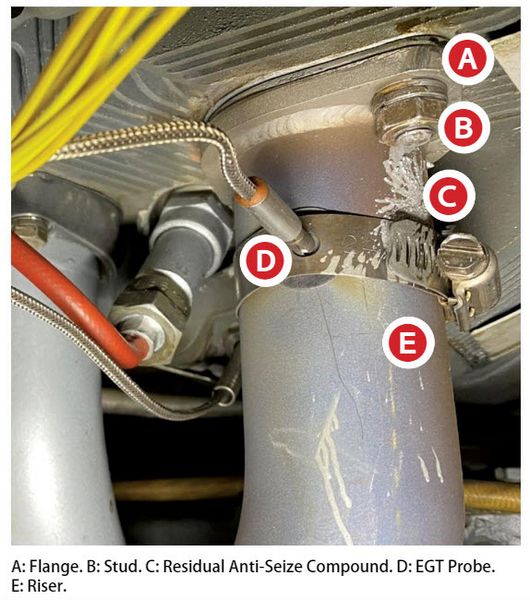
My mentor also taught the importance of lathering exhaust studs with high-temp anti-seize lubricant to protect them from corrosion. This sunk in after many hours of work to remove and replace corroded exhaust studs. Keep in mind that 14 CFR Part 43, where the FAA lists preventative maintenance items an owner can perform, exhaust work is not explicitly listed. You will need your mechanic to oversee your work when it comes to exhaust matters. If you choose not to be hands-on for this work, then you still must be educated about your airplane’s exhaust system as an operational best practice for safety.

Exhaust Repairs After Purchase
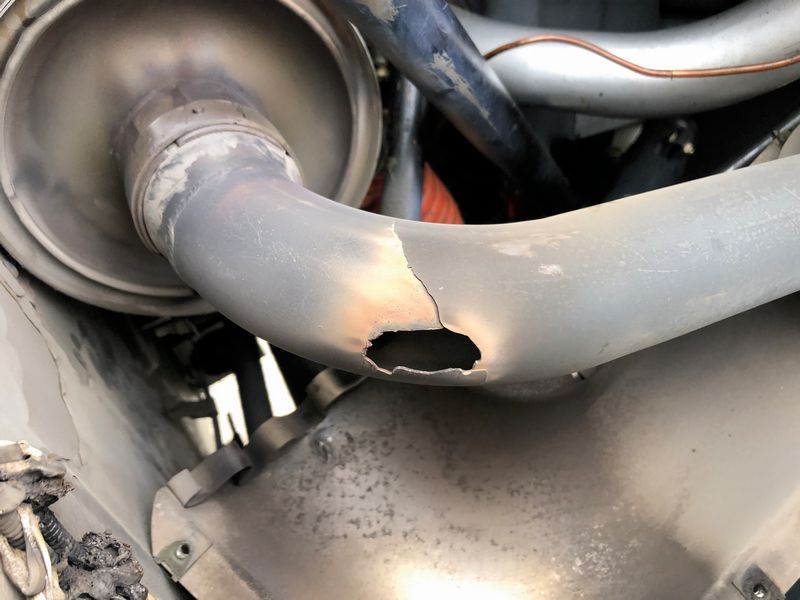
After a friend mentioned that he needed to repair or replace his airplane’s exhaust system shortly after buying it, I realized that of the five airplanes we have owned, four have needed major exhaust work in the first year of ownership. This is an indicator that we as owner/operators are not doing a great job maintaining our exhaust systems, and that prebuy inspections are not looking closely enough at exhaust systems.\
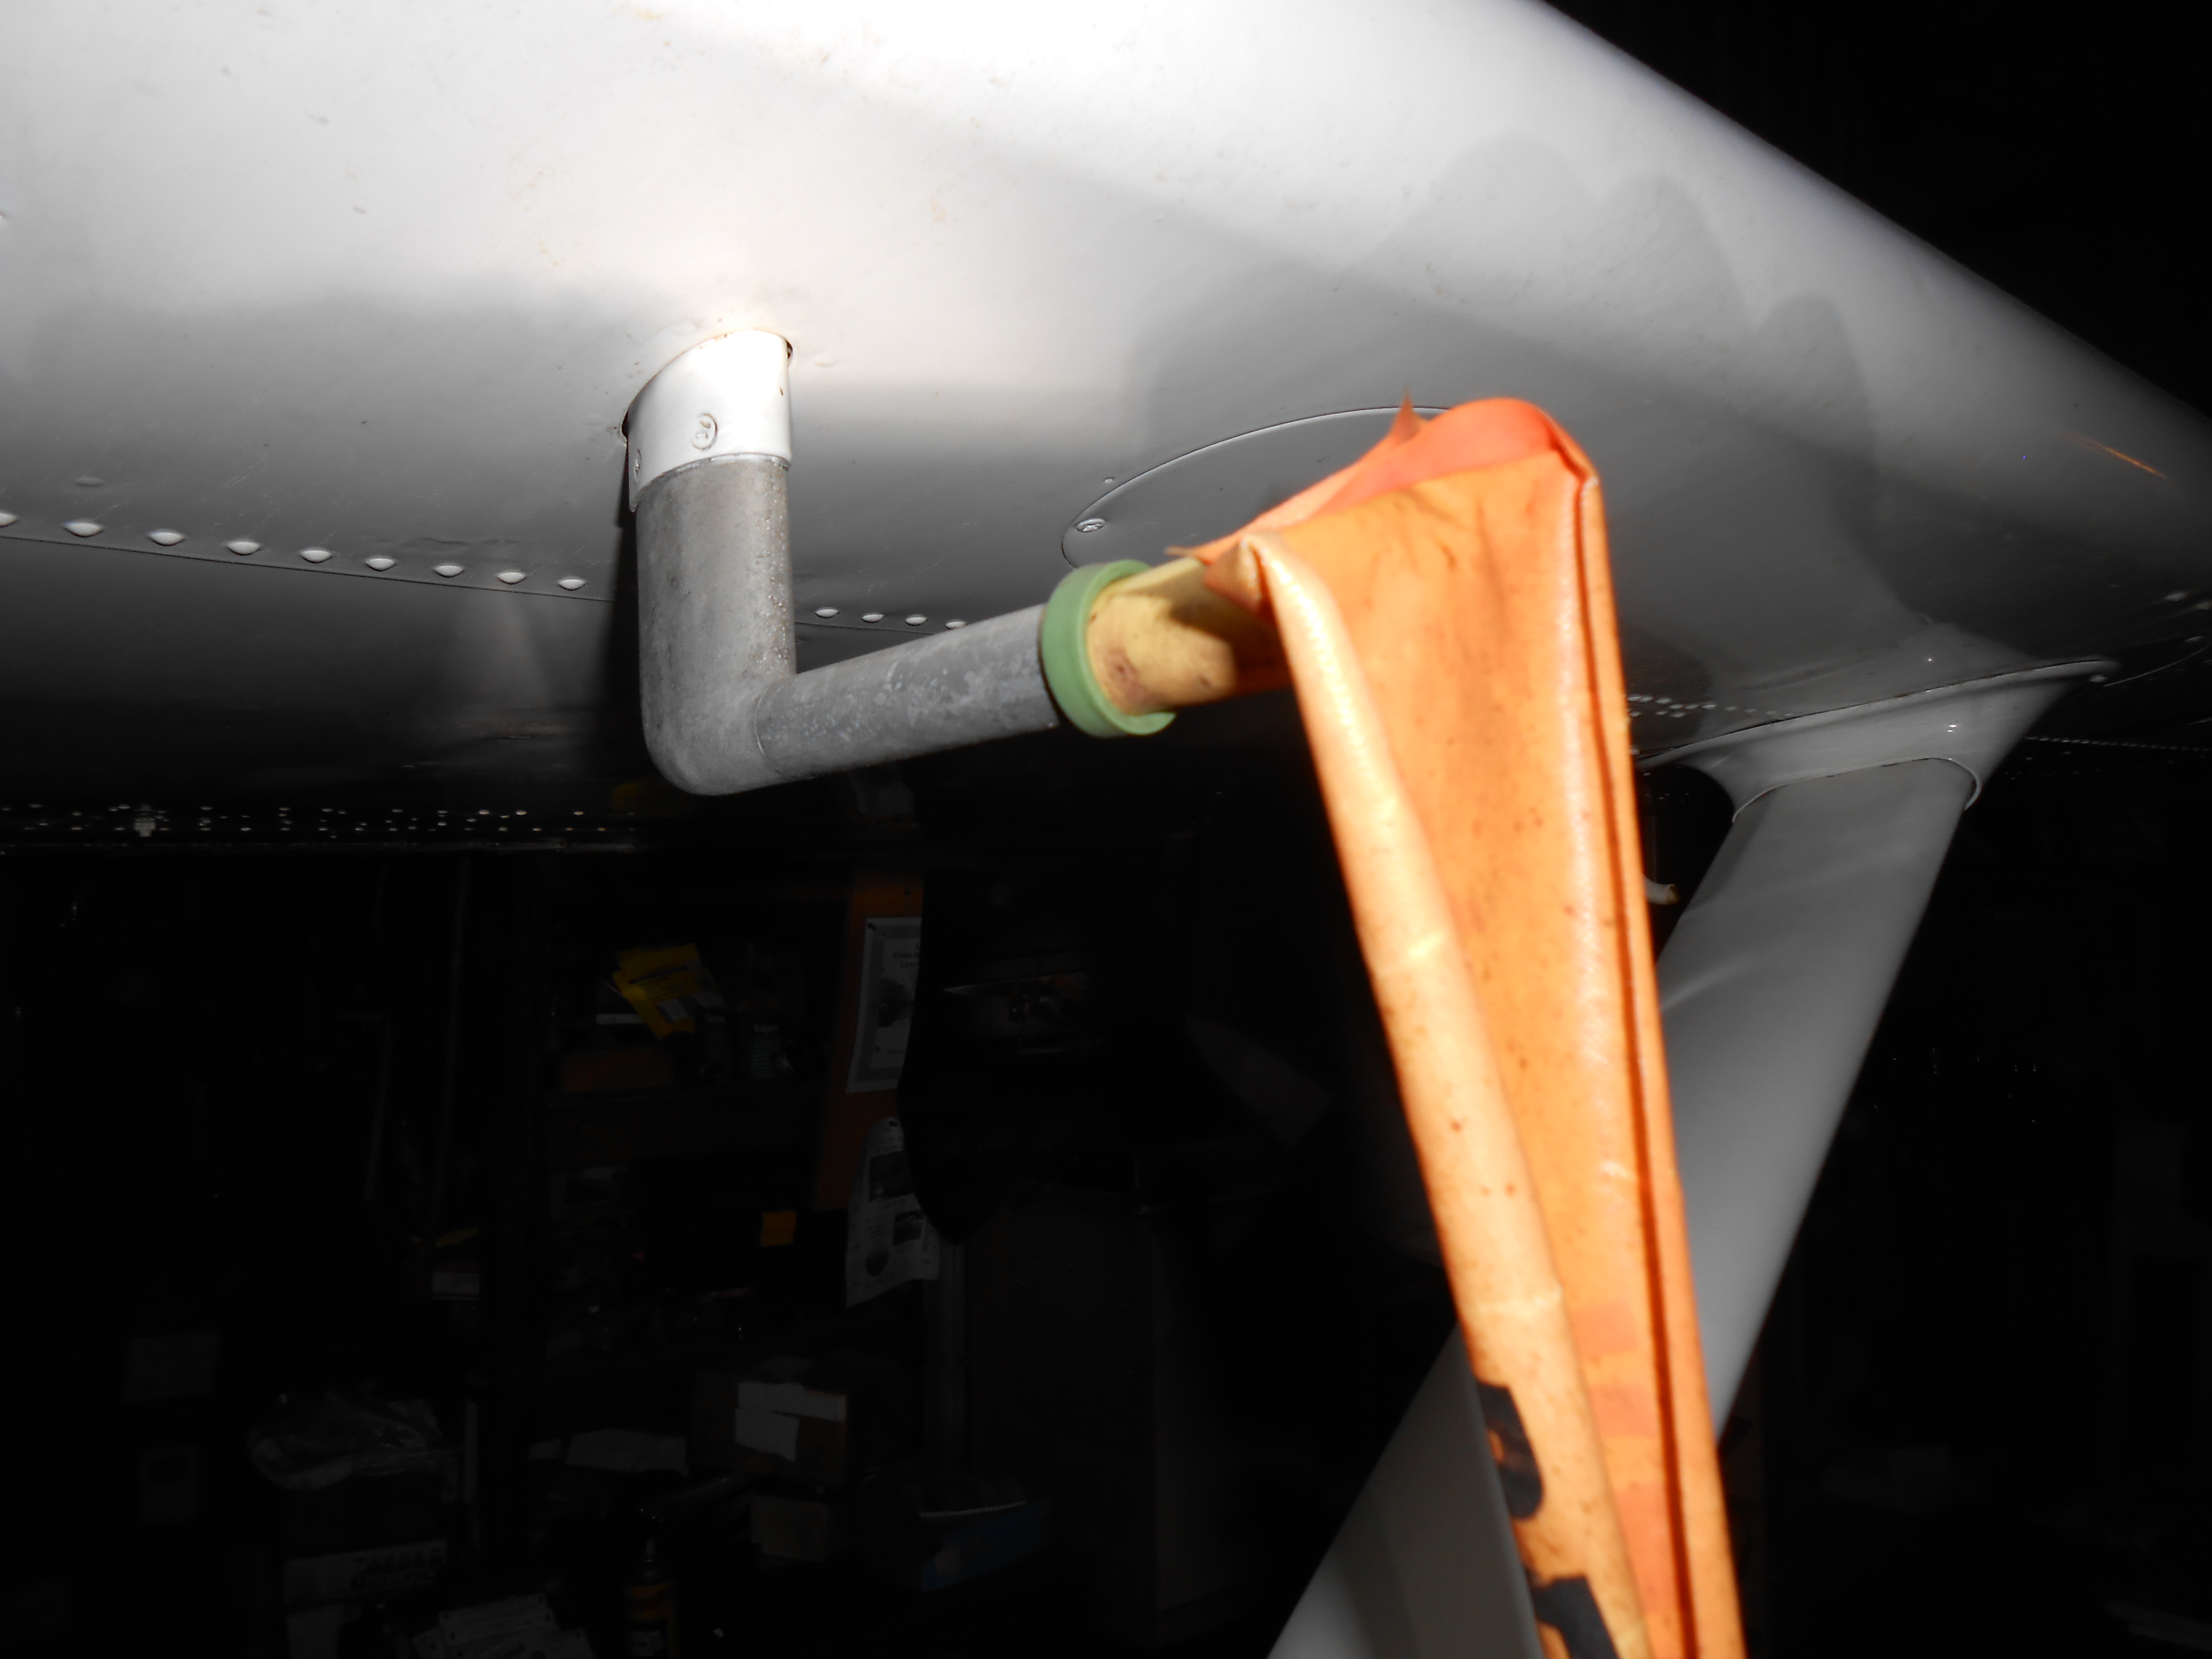
On a local flight in 2020, which was our first year of PA-22 Tri-Pacer ownership, we noticed significant exhaust odor and spiking of the CO meter in the cabin. After landing at the closest airport, we saw exhaust residue at the heater shroud that surrounds the exhaust on the co-pilot’s side. Removal of the shroud revealed its mounting bracket had broken off cleanly at the weld (see pictures). Prebuy inspections rarely include removal of heater shrouds, so we never even looked at this area prior to failure. As the owner/operators, this was our oversight and our mistake.
You Have a Digital CO Meter, Right?
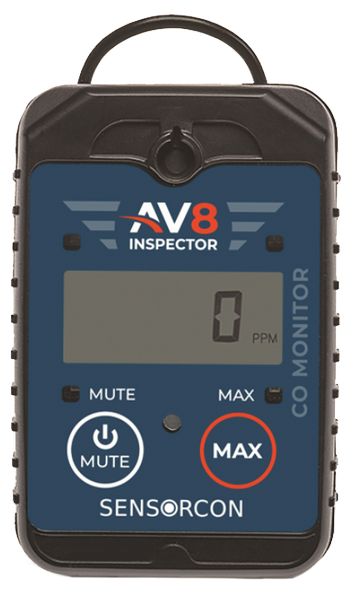
At a recent local gathering of pilots during the 2022 winter, I asked for a show of hands “Who has a digital CO meter?” and was disappointed to see none. I’ve used a small forensic carbon monoxide detector, and you’ll find when you move it from the glareshield to the floor, there will be a variety of readings, depending on your phase of flight. It’s great information to know so you can track down CO sources of entry and learn what is normal for your airplane.
[Ed. Note: See the February 2022 issue, “Sealing Off the CO.” COO partner Sensorcon’s CO monitor is pictured here.]
In our 182RG, we see readings of 10-12 ppm on the cabin floor while waiting at the hold line for a length of time. These readings often remain in the climb as the exhaust trail is pushed against the belly. Once we enter cruise flight, the readings go to zero. We’re still tracking down CO entry paths but understand these are typical CO readings.
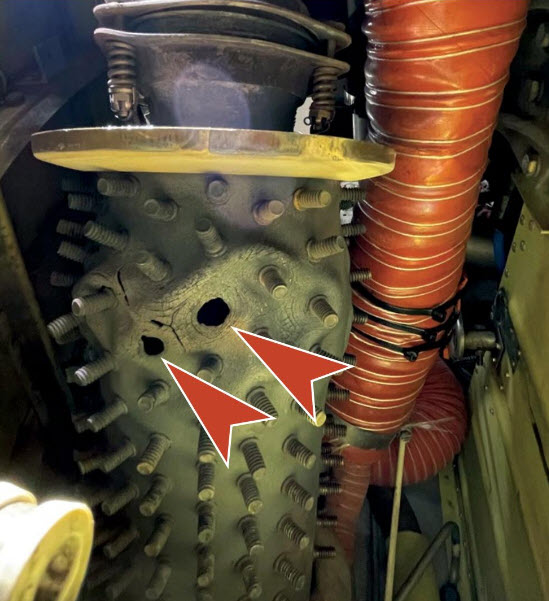
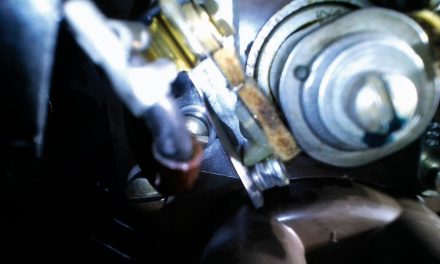
One pilot recently noticed 100 ppm on his CO meter and bulging and holes were found in the heater exchanger/muffler (see picture above courtesy of Dave Pasquale, Pasquale Aviation, pasqualeaviation.com).
Let me remind owner/operators that any amount of cabin CO is bad news, even if OSHA says 50 ppm is acceptable exposure. We’re sitting in an enclosed space in the airplane’s cabin, and we need to make good decisions. It seems every year as winter sets in and cabin heat is engaged, there is someone who falls unconscious in flight from CO exposure. Let us not forget to monitor CO in the cabin as a check on exhaust system functionality and passenger safety, too.
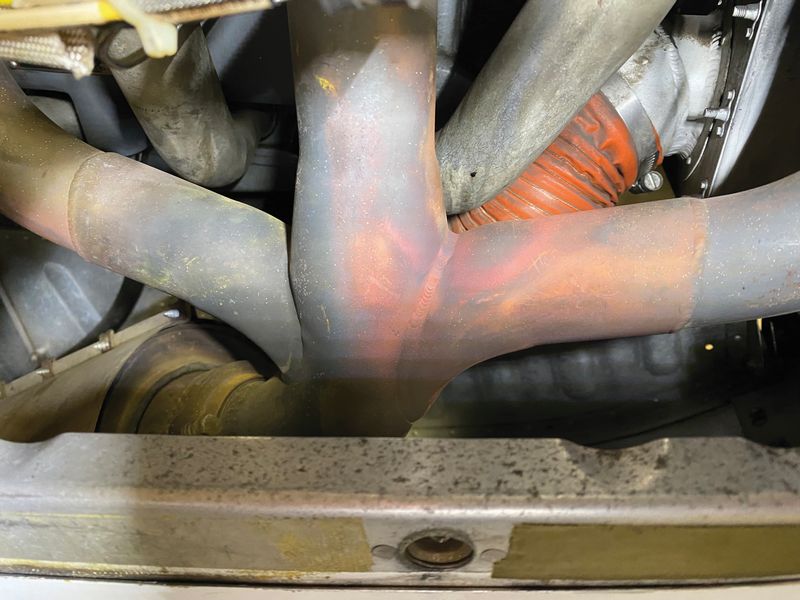
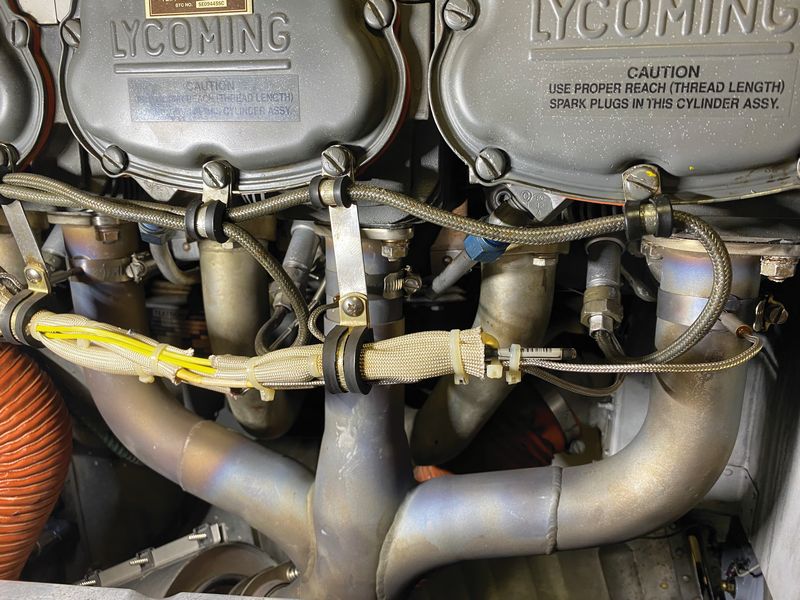
182RG Exhaust System Discoloration
After seeing discoloration on our 182RG exhaust system, I forwarded this picture to Charlie Feld at Aerospace Welding (AWI). Charlie is my go-to expert on exhaust systems, and he indicated the discoloration may be due to excessive thermal cycling and suggested removal of the entire system so they could inspect it.
It made sense to have AWI assess the entire exhaust system because the Air Plains 300XP conversion on this airplane is a slight variation to the standard Cessna system. This way they could use it as reference for dimensions for any replacement parts that needed fabrication.
After inspection by AWI, Eric Hanzel called to report their inspection found both left and right heat exchangers/mufflers were in need of replacement due to deteriorated internal baffles. However, after sandblasting the discolored collector and risers, no cracks were found, welds looked normal, and all was OK for Return to Service for the collectors. The replacement muffler’s cost was $1,400, and we replaced all stainless hardware and exhaust gaskets from Aircraft Spruce for another $200, so no small expense here. Be sure to only use the hard blow-proof gaskets.
Knowing the exhaust system is correct, safe for passengers, and will be providing hundreds of reliable flight hours reduces the pain of repair cost when we amortize the cost over those flight hours. Checking logs indicated a repair in 2014 but no significant work for the last 20 years of service. Like so many things on this airplane in our first 16 months of ownership, it was time to do some maintenance.
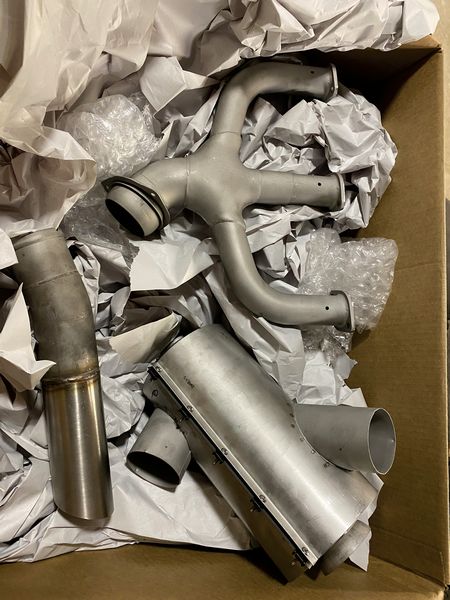
New Parts Installed
Installing the refurbished muffler is not as easy as removal and takes substantially more time. Lubing the collector to the heat exchanger joint and adjusting the tensioner springs by adding washers under the castle nuts takes a couple attempts to get the tension just right. While running up the nuts on the exhaust risers, be sure to check torques so you don’t overtighten.
Lycoming publishes 40 in-lbs of torque (minimum) for exhaust nuts, and this is the perfect time to use your new inexpensive .25-inch drive torque wrench. Riveting the baffle on the pilot’s side heater muff took some time, as did replacing the old scat hose on that side (the co-pilot’s side looked new), which completed the work. My hope and expectation is we should not need to do anything beyond visual inspections on this exhaust system for many years to come.
See Your Cessna Service Manual
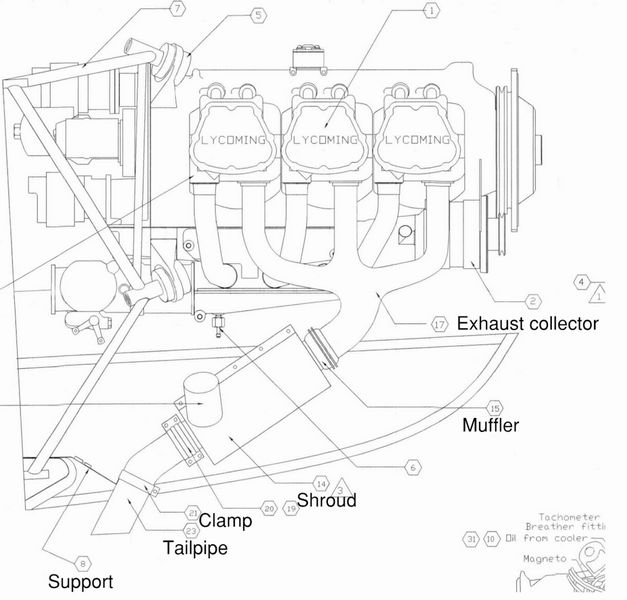
The Cessna service manual for your airplane offers a description of the exhaust system then goes into removal and installation procedures. For our 182RG, the section 11A-73 Inspection is the most useful item since, as owner/operators, it helps us identify issues before flight.

I will respectfully disagree with the 50-hour inspection recommendation in the manual and suggest you include exhaust checks in your pre- and post-flight checklists. In my view, 25-hour oil changes, or whenever you have the top cowl off, is the time for exhaust system visual inspections.
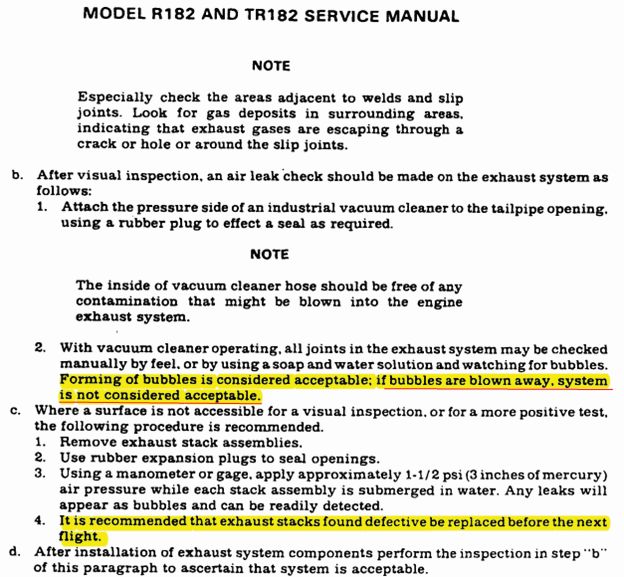
The vacuum cleaner-to-tailpipe air leak check is easy to do with your shop vac and duct tape around the tailpipe. If small bubbles form and they stay small, that is OK — remember the system tightens up when heated, so those leaks will seal up. But if the bubbles get larger (i.e. blown away) and may eventually burst, then that is a defect. Most importantly if defects are found they must be addressed before the next flight.
Your Exhaust System Condition: A Key Go/No-Go Item
Exhaust systems offer a great opportunity for owner-operators to raise the bar on safety by proactively monitoring system condition. For me, this is a primary reason for owning an airplane — to control its maintenance by fixing things before they break.
We must know how the exhaust system looks when all is well in order to identify an issue, and we must be vigilant about regularly looking for issues. Since many of our Cessnas offer poor access to inspect or view the engine compartment due to the single-piece top and bottom cowls, we must become familiar with the exhaust system when it is accessible to do so. Here’s my reference list to monitor your exhaust system:
- Top cowl removal. If you don’t know how to remove your Cessna’s top cowl, ask someone to show you. It’s not difficult; just take your time removing and move slightly on re-install until it falls in place. With the top cowl off, you can see the exhaust system, look for leaks, and grab things to see if they are loose.
- Include exhaust inspection in your pre- and post-flight checklist. If you only have access to the tail pipe, grab it and check for movement. If there’s looseness, that means further inspection is needed before flight.
- With top and bottom cowls removed at oil change or annual inspection, visually check muffler-to-collector joints for leaks or stains. Check each riser-to-cylinder connection for leaks or stains. I like to limit oil change intervals to no more than 25 hours to allow for close exhaust inspection.
- At annual inspection, be sure to inspect muffler internals for condition. This can be done with a borescope or by removal of baffles, tailpipes, or whatever is needed to get access. I like to smear high-temp anti-seize compound on the projecting stud threads to keep them from corroding. This makes it easier to remove exhaust nuts when the time comes.
- Use a digital CO monitor and keep it in your scan during all phases of flight.
- During runup, do not turn the ignition switch to the Off position, then return to a magneto, because the resulting backfire can damage the exhaust system. Instead check for P lead grounding by selecting the Off position of the switch while at idle and notice the engine begins to quit, then return the switch to a magneto, and it should continue running.
As the owner/operator, you determine if the airplane is airworthy for the next flight. Be sure to include the exhaust system in your assessment of your airplane’s flight readiness.
