If you take your high-speed bug smasher to most shops for an oil change, you’ll pay full retail for the oil and filters plus somewhere between 1-1.5 hours of labor at standard shop rates. If you drive a double-breasted bug smasher the costs double. In fact, it may be more than double since many shops have a higher hourly rate for twins.
Since FAR 43 A(c) allows you to change your own oil, why not buy a case or two at wholesale and do it yourself on a Saturday afternoon? It’s easy to do mentally, not very demanding physically, and will give you an opportunity to impress your significant other with how you’re the master of your fate and a legend in your own time.
Well, okay — no one will care that you know how to change your own oil, but you’ll save money and it really isn’t difficult to do.
Changing Your Own Oil in a Cessna: Single-grade or multi-grade?
I personally don’t like multi-grade oil. The reason is simple: I tried it twice over the years and both times the engine developed leaks at the case seam.
Now, I know this is anecdotal information and therefore suspect. I also know that those who live in the frozen north and don’t fly enough to change grades per the season will argue that multi-grade is the only way to go. And I also know that lab studies do not support any allegation that the chemistry of multi-grade oil is sufficiently different that its molecules can find ways to escape their crankcase prison more efficiently than their single-grade brothers.
All I know is I tried it twice, once with a Lycoming IO-540 motor and once with a Continental IO-470 motor. Both started leaking whereas they previously didn’t leak. I don’t plan to try it again.
My current ride has a Continental TSIO-360 EB on one wing and an LTSIO-360 EB on the other wing and I use AeroShell W100 Plus exclusively except in the winter when I drop back a grade since it does get cold in Kentucky in January and February.
Ultimately, the choice is yours. The reason I use AeroShell W100 Plus is because it was developed for Lycoming engines to help with some unpleasantness involving early failures of rather important moving parts, but its adhesion properties work just as well in a TCM engine.
All oils approved for use in aircraft engines are safe — meaning they normally don’t cause spontaneous disassembly of anything important. Some have added properties that are desirable, so you’ll have to match your kind of flying to the variety of products available and make your own decision.
A quick Cessna oil change suggestion
Most engines nowadays have a quick drain feature. If your engine doesn’t have a quick drain, forego the do-it-yourself oil change this time and have your A&P install one while they change the oil. It’ll make life much easier and far less messy when you take over the chore. (You can buy a Saf Air drain sump valve for less than $100. The part number is P5000 for all Lycoming engines and P6250 for all Continentals except the 0-300 and late C-145). [Ed Note: We found both at COO partner Aircraft Spruce]
Tools you’ll need to change your own oil on a Cessna
You’ll need a quantity of plastic tubing with an inside diameter that will tightly fit the outside diameter of the quick drain nozzle; a small, flat pan; and a large bucket. You’ll need a 1-inch socket, a micrometer-type torque wrench capable of at least 0-50 foot-pounds, and some .049 safety wire for the oil filter. You can twist the safety wire with any good pair of pliers, but to do it easily and safety wire like the pros, you might want to consider buying an inexpensive pair of safety wire pliers.
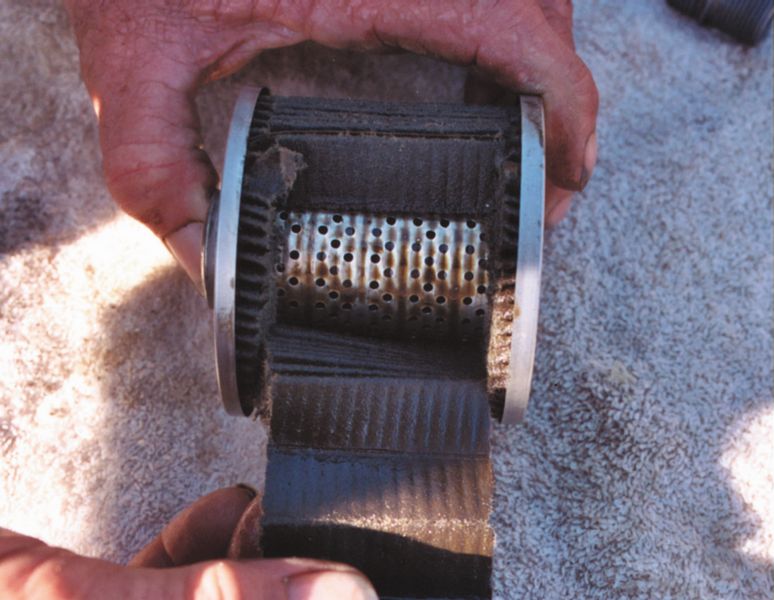
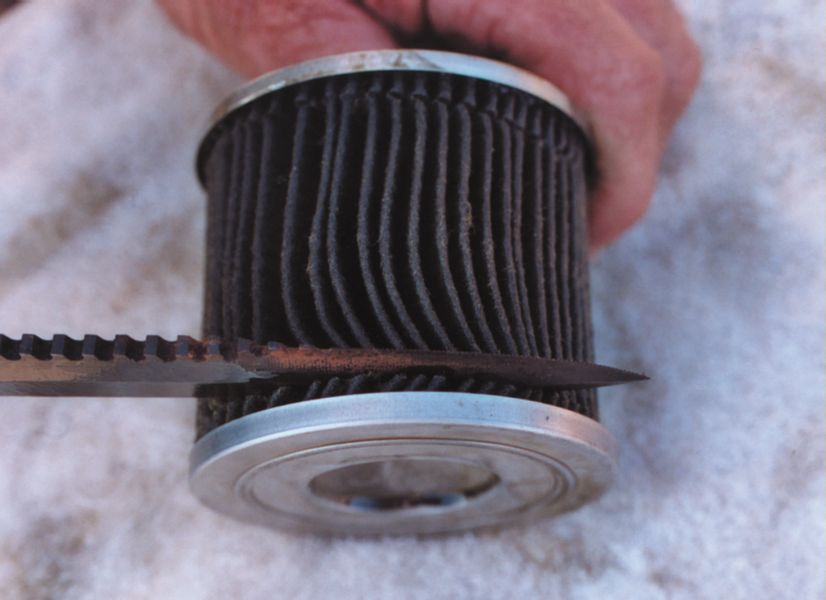
If you’re on good terms with your A&P, you don’t need a filter cutter, otherwise you’ll need to buy an oil can cutter (prices start around $70).
Lastly, buy some Dow Corning No. 4 lubricant, lay in a supply of shop rags, and you’re all set.
And here’s what you do
You’ve got the tools, a case or two of oil on hand, and the proper quantity of oil filters, so go flying to heat the oil, then park your baby and remove the cowling or cowlings.
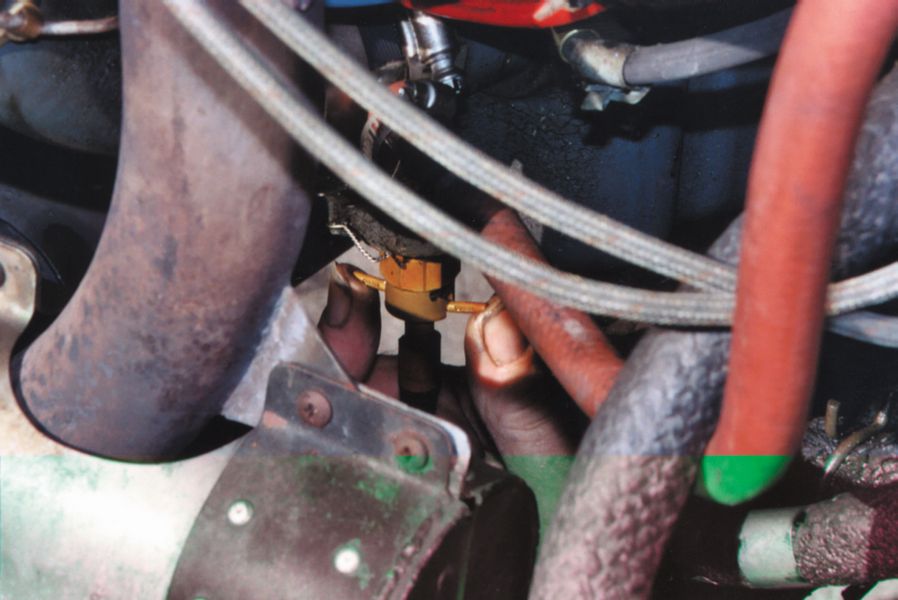
Connect the tubing to the quick drain and open the valve. Draining the oil will take a while so use the time to inspect the engine and all its various accessories while you’re waiting. Check the battery and top off the brake fluid and maybe have a look at the nose gear strut for proper extension. If you’ve done all the inspecting you can stand and the draining is still in progress, go get a cup of coffee while gravity does its thing.
Once the oil draining has slowed to just a drip or two, close the drain. Make sure the valve snaps completely closed.
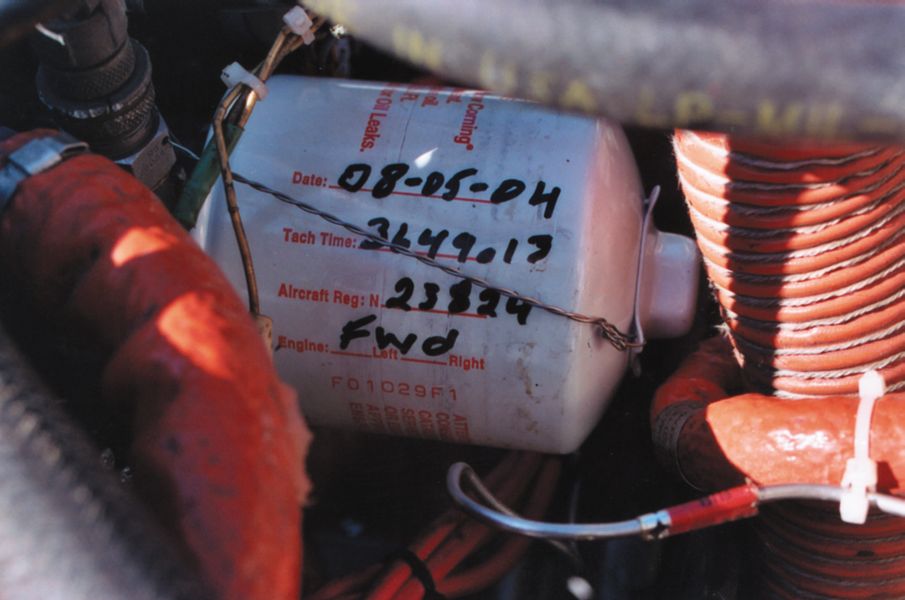
Move to the oil filter and note how the safety wire is installed. The filter has to be safety wired to something on the engine, not to something on the engine mount or airframe. You’ll likely find that a hole is conveniently located on the engine near the oil filter mounting point — and that’s where the old filter is currently safety wired. Cut the safety wire and place or hold the flat pan under the filter. Use a ratchet wrench and the 1-inch socket to break the filter loose and screw it out, catching the leaking oil in the flat pan. Take the filter somewhere it can drain (into something that will hold a quart of oil) and leave it alone for a half hour or so.
Take a shop rag and clean the boss where the new filter will mate to the engine, taking a look at the place where the filter’s threads will mate with the engine’s threads. If you find any damage, ask your A&P to take a look.
Assuming there’s no problem, coat the new filter’s gasket with a layer of Dow Corning No. 4 lubricant. (In a pinch, you can use engine oil, but a better seal will be made with the DC No. 4). You don’t need to pile it on by the way — just a nice, even coating will do nicely.
The rest of this article can be seen only by paid members who are logged in.Have a website login already? Log in and start reading now.
Never created a website login before? Find your Customer Number (it’s on your mailing label) and register here.
Still have questions? Contact us here.
And that’s all there is to it. Fifty hours from now, do it all over again. The best part is that because you’ve already invested in the tools you’ll need to complete the job, you’ll really begin to see the savings.
John Loughmiller is a 4,000 hour + CFIIMEI-A and an Aviation Safety Counselor for the FAA’s Louisville, KY FSDO.

