By Jim Faix
Have you recently upgraded your Cessna? Send us your story!
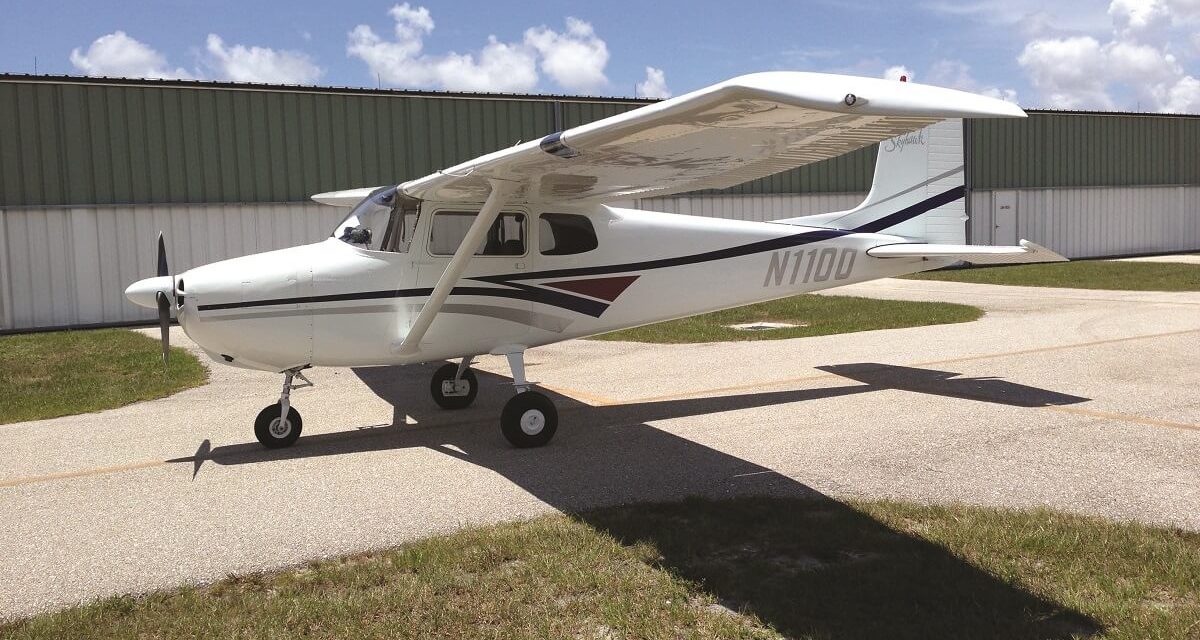
In 2010 I bought an old, worn out 1956 Cessna 172 that was just about ready for the junkyard. I figured it would be great to have a plane that was the first year of that model. It would be like having a 1953 Corvette or a 1964 Mustang.
Although it was in rough condition cosmetically, it was beautiful to me — and in a price range that I could afford — and it was mostly complete. Knowing this was a “project plane,” we went over it thoroughly and made several squawk sheets of the things it needed. Actually it was more like a book of squawk sheets. Although it wasn’t flyable, I figured I would have it flying in a year, which turned into two, then three, then four, then five.
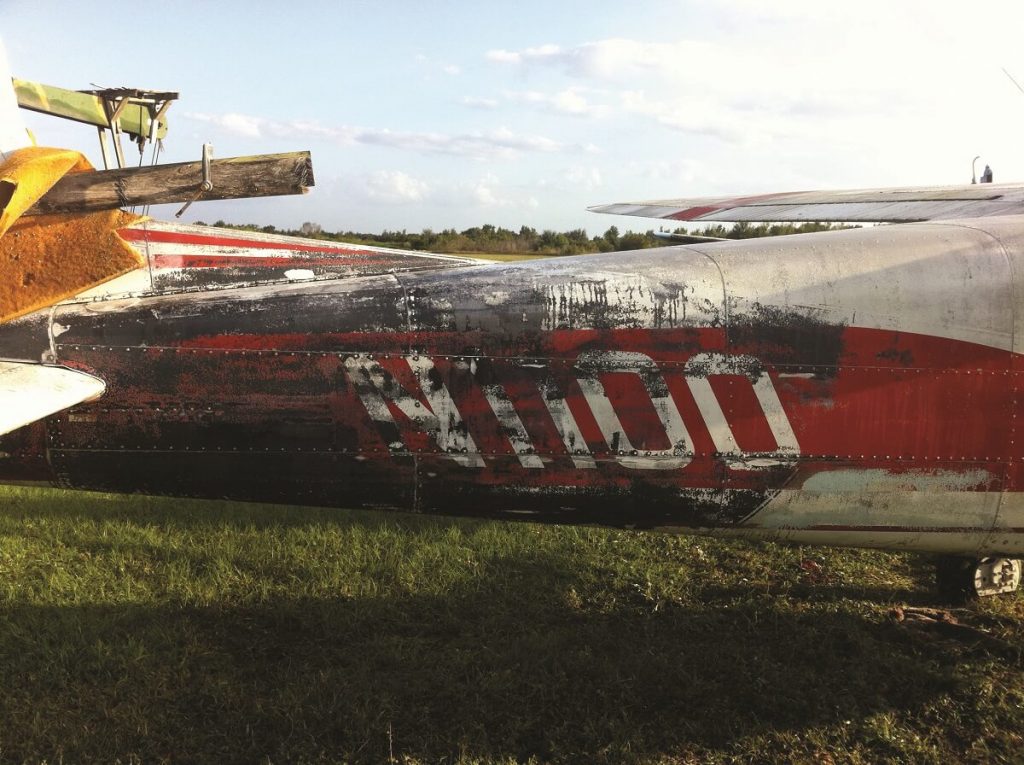
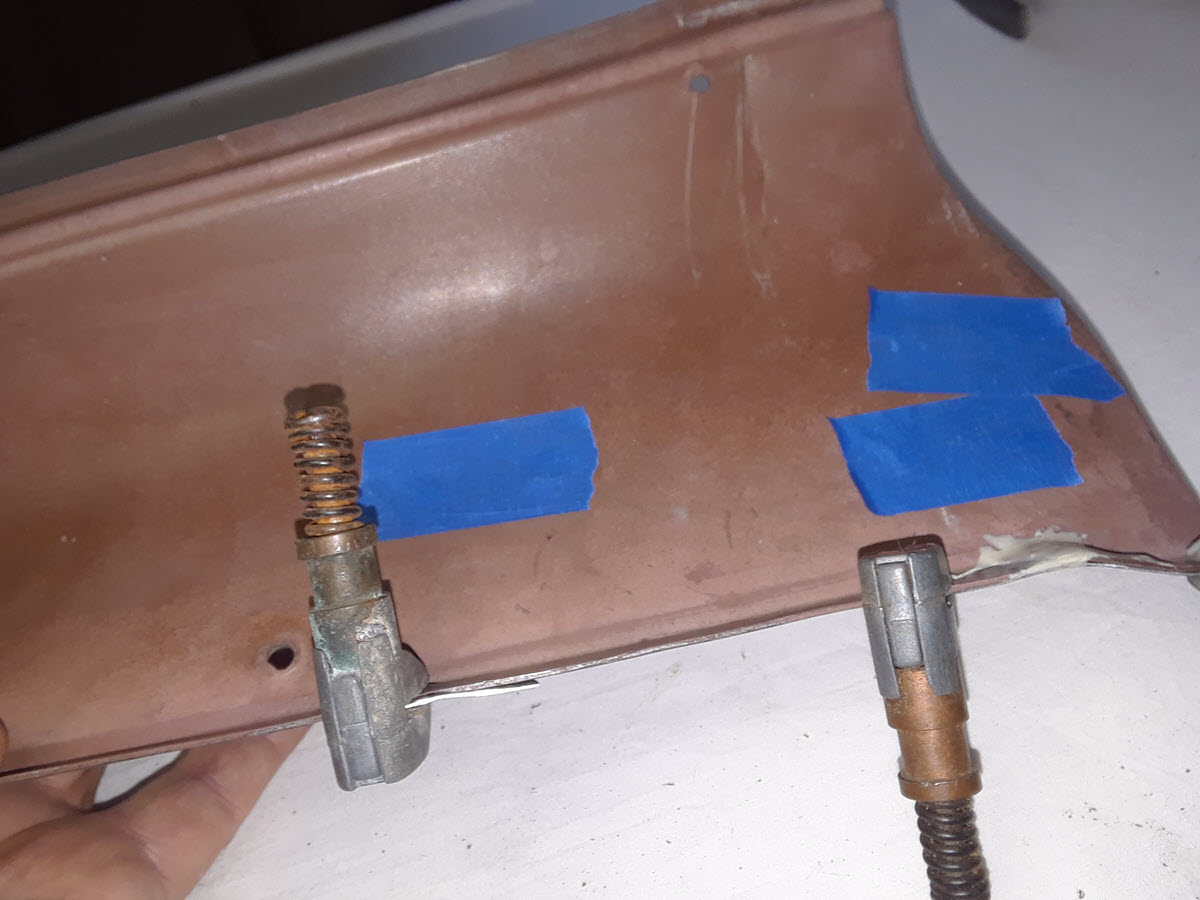
For the first 3 years, I worked on it on Saturdays in the hot Florida sun. Everything made of rubber had to be replaced along with some cables, lights, windshield, complete new interior, radios, and some other major components (read: wing, horizontal stabilizer, rudder). Stripping five old paint jobs took a year all by itself. The outermost paint surface was as rough as 60-grit sandpaper.
I figured that by working on it only on Saturdays my pace was severely hampered and I needed to step it up a bit and work on the major components at home. So, in the fourth year, with the help of some friends and A&Ps, we took the airplane apart, loaded it onto two trailers, and towed it 50 miles to my home where work continued in my garage with the fuselage sitting in the backyard. Fortunately, my home wasn’t in a deed-restricted neighborhood at that time. I called it “yard art” but my neighbors were not impressed. No sense of humor. What do they know? They probably wouldn’t recognize a dipstick if they were holding one in their hand.
Then I moved to a deed-restricted neighborhood. The fuselage couldn’t go with me so I rented a hangar at Sarasota Bradenton International Airport (SRQ). Since I only lived a mile and a half from the airport, I hooked up the tow bar to my Jeep and towed the center section down the road late one rainy night and tucked it away in its new hangar in about 10 minutes’ time. I figured it was better to beg for forgiveness than ask for permission. Fortunately, we didn’t have any encounters with vehicles equipped with blue flashing lights. I figured it would be OK since it technically was a registered vehicle. I stored the wings and tail feathers on the lanai (Florida speak for back porch) of my new home a while longer until they were ready to go to the hangar.
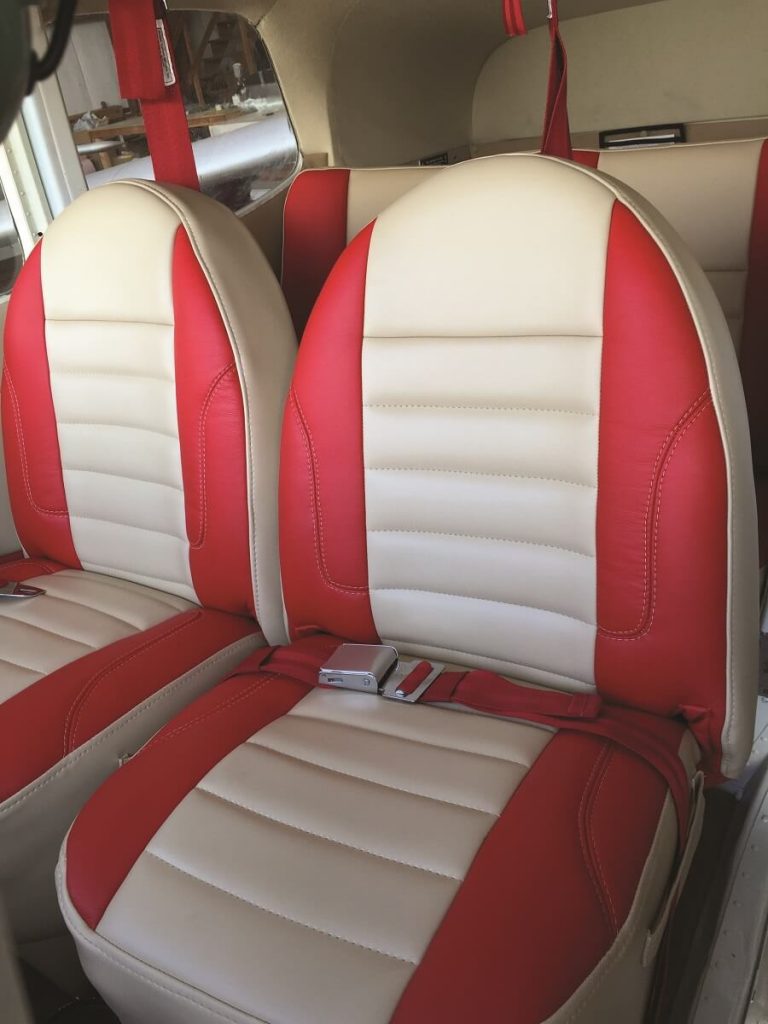
N1100’s new interior.
See more pictures of Jim’s restoration in the March issue of Cessna Owner magazine.
After 4 years and 7 months, I loaded the center section back onto the trailer again and towed it through downtown to a local body shop for its paint job. After the paint job, Screaming Aero Graphics of Ocala, Florida, applied the stripes and registration numbers. After 3 more months of reassembly, I had the annual conducted and I flew it for the first time. Wow, what a feeling of accomplishment! It flew straight and true with the ball centered.
The key to restoring a project plane is to make progress every time you touch the plane. Before you know it, it turns into measurable progress. Document everything in writing and take lots of photos. Documenting my progress made a great slideshow for my EAA chapter. My motivation to finish this plane was the thought that if I didn’t, all I had was a pile of used airplane parts. It wasn’t an airplane until the paperwork said it was an airplane. Document everything and save the receipts and any paperwork that comes with the parts. There is an old saying: When the paperwork exceeds the gross weight of the airplane, it’s ready to fly.

The Skyhawk’s old panel. 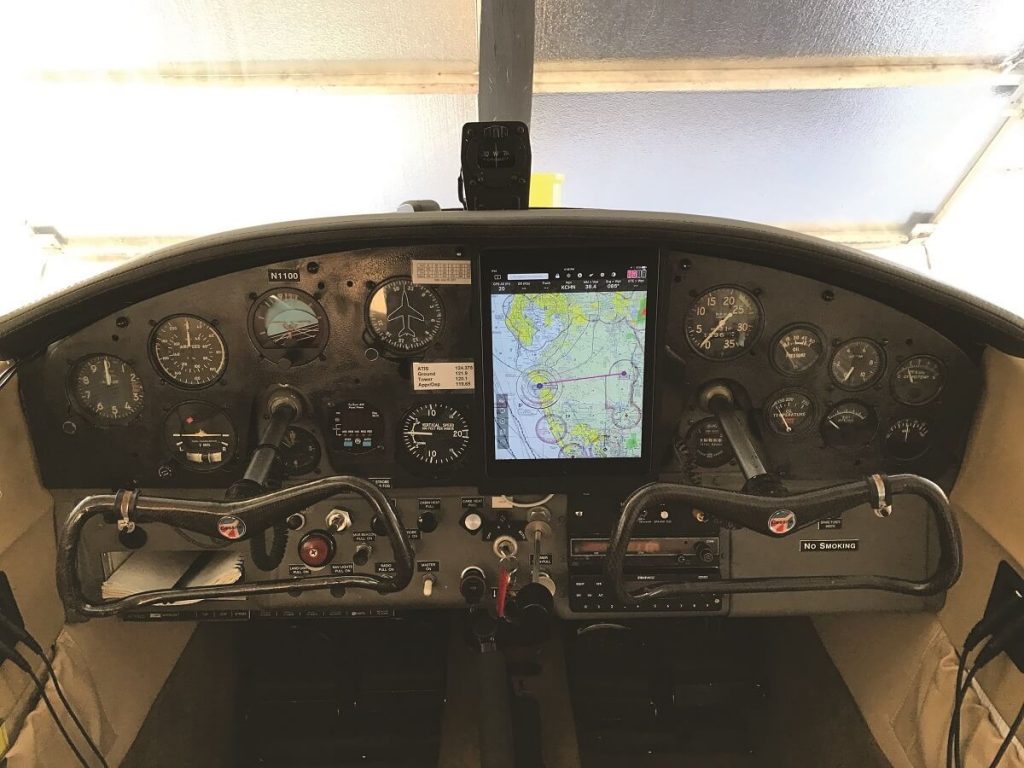
Jim’s new panel including a panel-mounted iPad Pro.
Since taking ownership of this masterpiece in 2010, I’ve added a few things to customize it to my liking, but not too much to take away from the “retro” aspect of this plane. I’ve added new interior; a new radio; Stratus ESG ADS-B transponder; ACK Technologies A-30 Altitude Digitizer; Artex 345 ELT; LED landing, taxi, and position lights; a one-piece windshield; Brackett air filter; Hooker Harness shoulder harnesses; Sky-Tec lightweight starter with push-button start; Plane Power alternator and voltage regulator; strobe; door steward; JPI FS-450 digital fuel flow; EZ Flap handle; Airwolf air/oil separator; spin-on oil filter; and Micro AeroDynamics vortex generators. Since none of my navigation instruments worked when I got it, I now navigate exclusively with a panel mounted iPad Pro running iFly GPS.
I would like to thank my loving wife, Ursula, for tolerating my Saturday absences and for allowing me the freedom to follow my dream. In addition, I’ve had several A&P/IAs following my every move along this journey and they deserve my heartfelt thanks. George Lee, my IA from Jupiter, Florida, conducted the annual that made this pile of parts an airplane again. I can’t thank him enough for his guidance. Anyone thinking of restoring an old airplane should think about the time and money commitment needed to finish their project. Now my plane looks and flies like a new C-172, and I know every inch of this plane. I always draw a crowd everywhere I land.
I also want to thank my late mother. When I was a boy, I told her I wanted to grow up and be a pilot. She said I couldn’t do both. Boy was she right!
See more pictures of Jim’s restoration in the March issue of Cessna Owner magazine.
