By Elizabeth Gibbs
Continuing our study of AD 2011-10-09 — the airworthiness directive regarding seats in most single-engine and some multi-engine Cessnas — Paul New provided an example of how to easily check seat pin engagement.
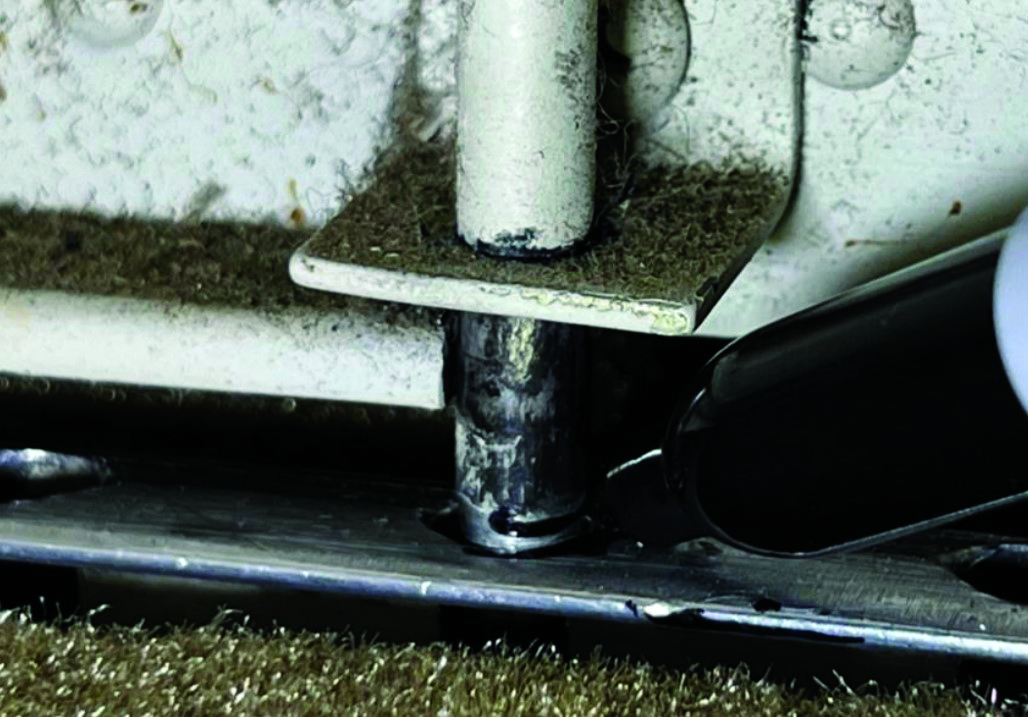
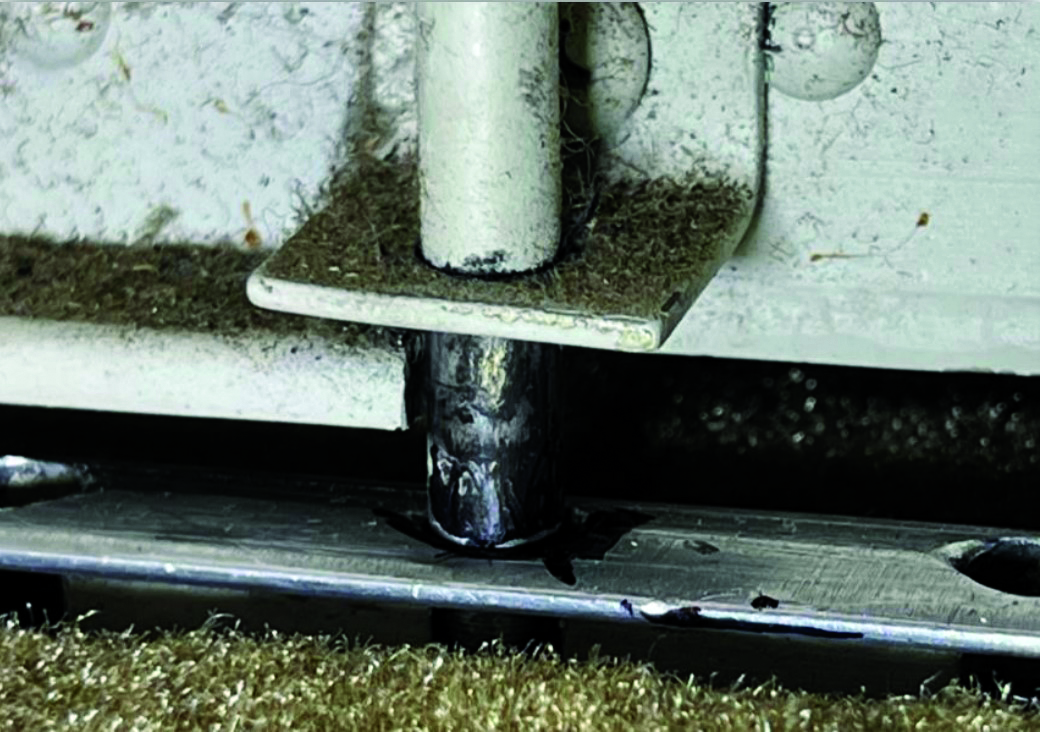
In his May 2022 webinar, New described his preferred way to check the seat pin. “One way to check it is with the pin fully engaged. You have to lift the seat, so you want the tangs underneath the seat to be pulled up against the bottom of the seat rail and the pin fully engaged. Then you can make a mark like I was doing here with the felt marker. You see how it’s even in the center picture, and then on the right side we retract the pin.”
This slide from his presentation shows three photos of a seat pin in various stages of engagement. The first photo shows New drawing a line on the pin with a marker, the second shows the fully engaged pin, and the third photo demonstrates pulling the pin up to reveal the amount of the pin that was secured in the hole of the seat rail.
After drawing a line on the pin where it sits on the top of the seat rail, New checks for the amount of pin engagement. “We want to make sure that we have .15 inch of engagement, which is a little over an eighth of an inch.” He is referring here to the length of the pin from the drawn line to the bottom, or how much of the pin goes into the hole to secure it.
“You have to have that much,” New emphasizes. “Some of our seats have two latching pins, one on each rail. Most of them just have one, so it’s really important to get these engaged well.”
Many Cessna owners do some variation of the “seat dance” as part of their preflight checklist, which is a very good habit to get into. New has one other piece of advice for making sure the pin is engaged.
“You can push down on the handle so these pins get fully engaged. Don’t rely on the spring. The spring has to be tight. That’s part of the AD also, to check that the spring pulls the pin into place. Put a little pressure with your thumb on that handle, just to be sure it’s all the way down.”

Elizabeth Gibbs (writer) and Lyle Jansma (photographer) are private pilots and co-owners of a Cessna 172. When they’re not flying above the beautiful Pacific Northwest, they are working hard designing instrument panels for other Cessna owners. To learn more about upgrading your instrument panel, visit sixpackaero.com.
